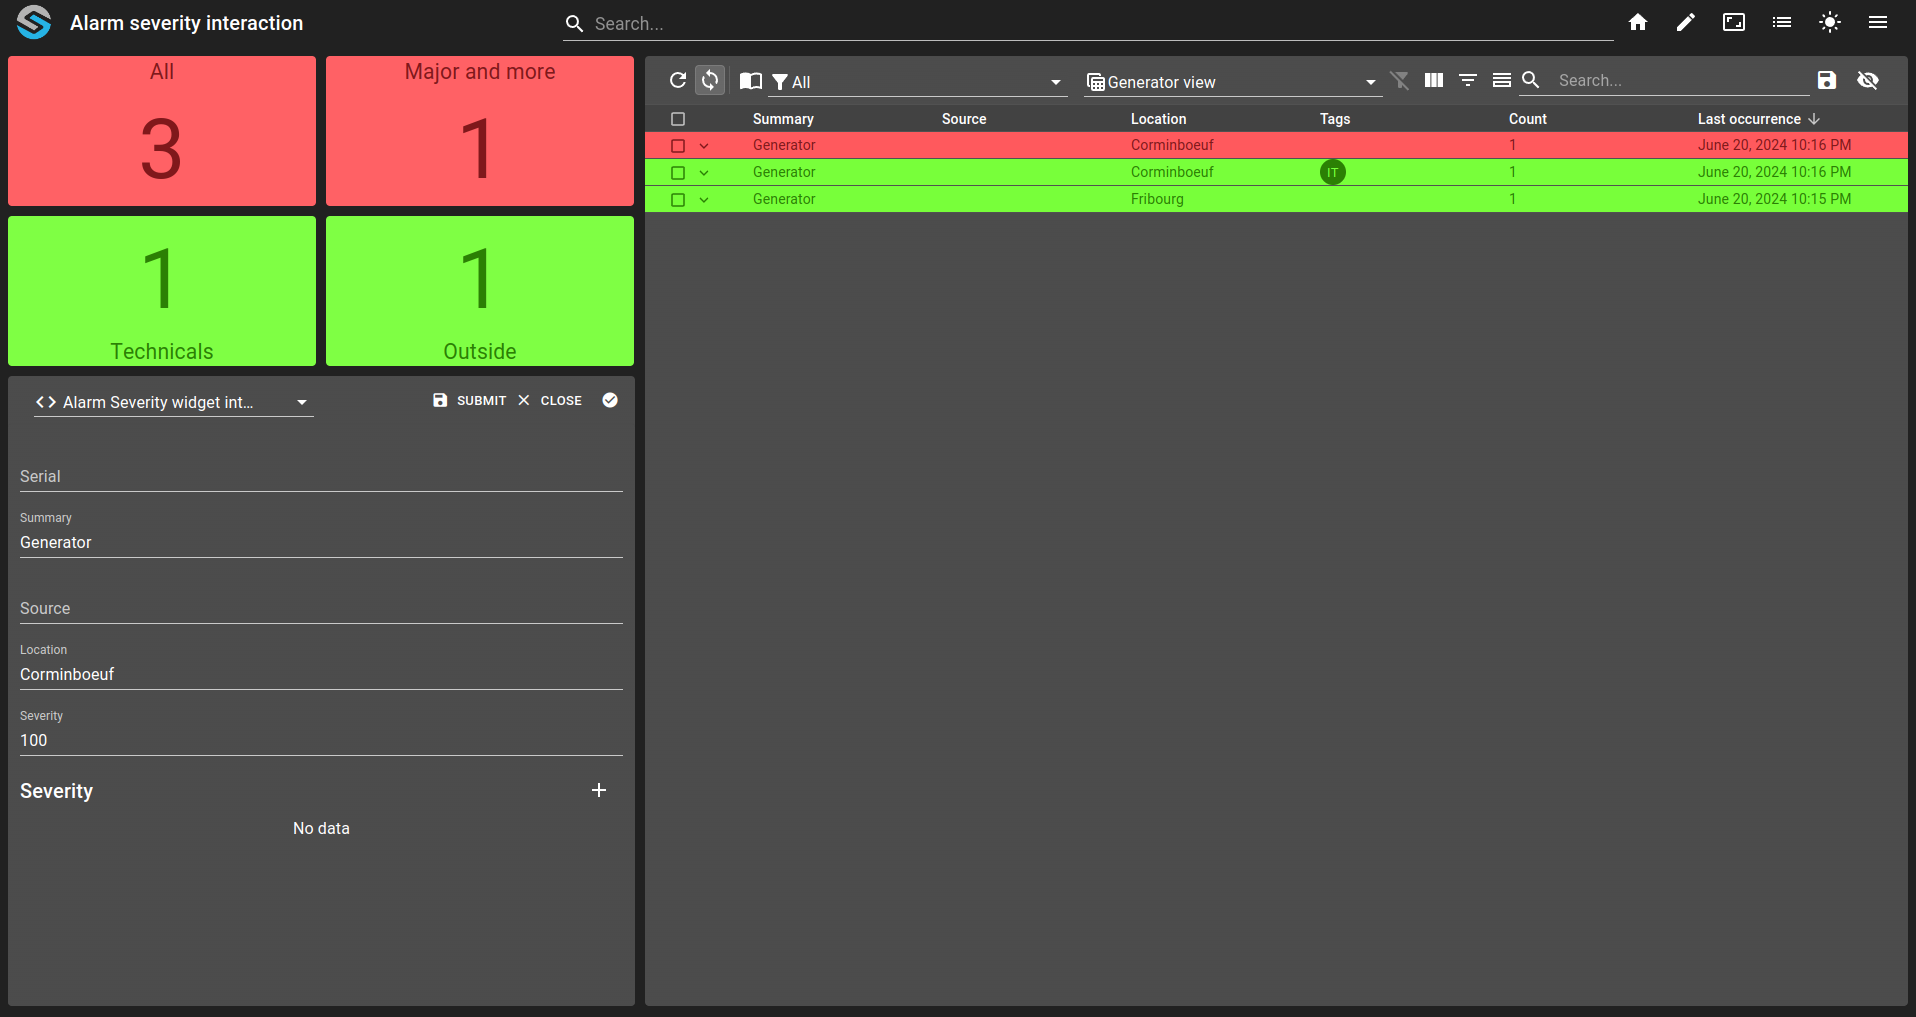
Alarm table filter update with alarm severity widget
The tutorial guides you through how alarm severity widget can be used to update alarm table filter.
Create four alarm filters (all, major-and-more, remote, technical) each with a count and max-severity value.
Link each AlarmSeverity widget to its corresponding count and severity values.
Configure the
onClickhandler on each widget to callosp.widgets(...).updateFilter(...)and update the AlarmTable filter.Use a Form widget to generate test alarms and verify the interaction.
git checkout origin/osp-alarms-configuration .
git checkout origin/osp-web-configuration .
git checkout origin/osp-scripts-configuration .
git checkout origin/example-dashboard-alarm-severity-widget-interaction .
Steps
1. Create a dashboard with widgets
The first step is to define a dashboard see this other example for how to.
In our example, we create a dashboard with the following widgets:
1 Alarm table widget to view alarms
4 Alarm severity widget to count and update alarm table filter
1 Form widget to generate alarms
2. Create alarm filters, count and max severity
In order to show alarm severity widget count and max severity, we need to create 4 filters.
root/feature/alarm-severity-widget-interaction/filters/all/filters.alarms
The first filter will match all alarms.
{
    "moduleId": "modules.alarms.alarms-1",
    "query": "{}"
}
root/feature/alarm-severity-widget-interaction/filters/major-and-more/filters.alarms
The second filter will match alarms with severity of 500 (major) and more.
{
    "moduleId": "modules.alarms.alarms-1",
    "query": {
        "severity": {
            "$gte": 500
        }
    }
}
root/feature/alarm-severity-widget-interaction/filters/remote/filters.alarms
The third filter will match alarms with location outside of main location.
{
    "moduleId": "modules.alarms.alarms-1",
    "query": {
        "location": {
            "$ne": "Corminboeuf"
        }
    }
}
root/feature/alarm-severity-widget-interaction/filters/technical/filters.alarms
The fourth filter will match alarms with TECHNICAL and IT tags.
{
    "moduleId": "modules.alarms.alarms-1",
    "query": {
        "tags": {
            "$in": ["TECHNICAL","IT"]
        }
    }
}
For each filter, we create two value associated with it to track:
Alarm count matching filter
Highest alarm severity matching filter
For example, we create, for all filter:
root/feature/alarm-severity-widget-interaction/filters/all/count/owner.alarms
{
    "filterId": "root.feature.alarm-severity-widget-interaction.filters.all",
    "type": "ALARM_COUNT"
}
root/feature/alarm-severity-widget-interaction/filters/all/max-severity/owner.alarms
{
    "filterId": "root.feature.alarm-severity-widget-interaction.filters.all",
    "type": "MAX_SEVERITY"
}
3. Add interaction to alarm severity widgets
Open dashboard.view file and seek the AlarmTable widget id. When found, seek the four AlarmSeverity widgets.
Setup the proper count and severity for each widget.
For each widget, we add, in alarmSeverityWidgetSettings the onClick attribute. In this, we add, for example, the following code:
osp.widgets('OugLE_qA').updateFilter('root.feature.alarm-severity-widget-interaction.filters.all')
This code retrieves the AlarmTable widget (id being OugLE_qA) and instruct to update the filter with root.feature.alarm-severity-widget-interaction.filters.all.
Repeat the same behavior for all four AlarmSeverity widgets.
4. Generate alarms and test interaction
Access the root.feature.alarm-severity-widget-interaction dashboard. Use the Form to generate alarms for each given filter.
Result
Upon retrieving the example, you can then access the root.feature.alarm-severity-widget-interaction dashboard. By default, you will see the following result: