Configure SSO with SAML
This example explains how to configure OnSphere to delegate authentication to a SAML server, supporting both self-signed and externally-issued certificates. No downloadable configuration example is provided for this page — follow the steps below manually.
Add the SAML identity provider certificate to the Keycloak configuration (self-signed or externally-issued).
Configure the SAML identity provider via the Keycloak admin console or the
identityProviders.keycloakfile.Map SAML user attributes (email, username, name) using Keycloak protocol mappers.
Export the final configuration from Keycloak and integrate it into the OnSphere configuration files.
git checkout origin/osp-keycloak-configuration .
Steps
1. Add the certificate
SAML using a not-self signed certificate
Open the
/modules/keycloak/keycloak-1/module.keycloakfile
SAML using a self signed certificate
On the configuration create the
certs/externalfolder if it doesn’t exist.Add the CA certificate as PEM into
certs/external.Push the new configuration.
Restart the
Keycloakmodule.
2. Configure the server
With the keycloak front-end (Recommended because it simplifies the test)
Access the Keycloak administration console
https://<stack_ip>:<stack_port>/auth/admin(for example https://stack-1.onsphere.local:5000/auth/admin).Login to Keycloak administration console using administration user and password configured when the stack was deployed (see System security).
Access the
Identity Providerstab.Select
SAML v2.0on theAdd providermenu.At the bottom of the page under
Import External IDP Config

Use the url providing the
FederationMetadata.xmlof your AD to configure it.Directly import the
FederationMetadata.xml.
Configure your SAML server with the metadata from keycloak
https://<stack ip or hostname>:<port>/auth/realms/onsphere/protocol/saml/descriptor.Configuration of the identifier for the user
AD
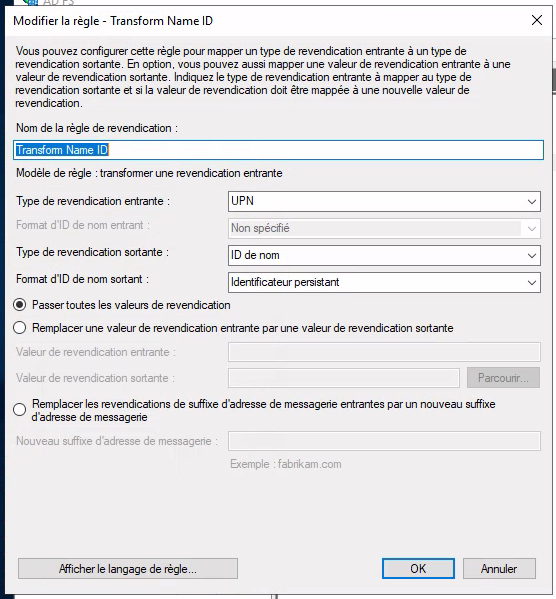
Keycloak

When a user uses the Identity provider for the first time, it will need to provide an email, username, name and firstname.
This step is skipped if the mapper for the field is configured.
Once everything is working properly, you can export the configuration and integrate it to the OnSphere configuration.
Go to the
Exportmenu on the left and clickExportIn the downloaded file search for
IdentityProvidersandidentityProviderMappersCopy the identity provider.
Open or create the
/modules/keycloak/keycloak-1/identityProvider.keycloakfileAdd the following content if missing
{
    "identityProviders": [],
    "identityProviderMappers": []
}
Add the copied identity provider to the list.
Remove all id to avoid any conflict.
See osp-keycloak for a complete federation file.
With the configuration file
Copy osp-keycloak complete identity provider file.
Add its content to the
/modules/keycloak/keycloak-1/identityProviders.keycloakfileUpdate the file base on your LDAP configuration
Push the configuration
Check the keycloak logs to see if there are any errors.
If necessary modify the configuration to fix the errors.
Access the Keycloak administration console https://{stack_ip}:{stack_port}/auth/admin (for example https://stack-1.onsphere.local:5000/auth/admin).
Login to Keycloak administration console using administration user and password configured when the stack was deployed (see System security).
Check if the groups and user are properly created.