Create an alarm with an output
In this tutorial, you will learn how to create an output that creates an alarm when a value change state.
Create a variable that acts as a boolean trigger for alarm creation.
Define an alarm output (
output.alarms) that specifies the alarm properties.Attach a callback to the trigger value so the output fires on each state change.
Display the trigger and the resulting alarms side by side on a dashboard.
git checkout origin/osp-alarms-configuration .
git checkout origin/osp-web-configuration .
git checkout origin/osp-variables-configuration .
git checkout origin/example-alarms-created-from-output .
Configuration structure
![@startuml
package "root/alarm-trigger" {
[value.ospp] as trigger
}
node frontend as "Front-end"
node ospalarms as "osp-alarms"
frontend -[#black]> trigger : <size:11><color:black> **Change the value**
trigger -[#firebrick]r-> ospalarms : <size:11><color:firebrick> **Create alarm**
@enduml](../_images/plantuml-d60f16e98adccbfbe149be00396a91b725a4fa15.png)
Steps
1. Create a variable to trigger the alarm
root/alarm-trigger/value.ospp
{
    "name": "Alarm trigger",
    "description" : "Trigger an alarm",
    "type": "BOOLEAN"
}
root/alarm-trigger/owner.variables
{
     "moduleId": "modules.variables.variables-1",
     "default": false,
     "persistent": true
}
2. Create an alarm output and callback to react on the change of the value
root/alarm-output/output.alarms
{
    "moduleId": "modules.alarms.alarms-1",
    "if": "trigger.content",
    "then": {
        "serial": {
            "type": "FIELD",
            "field": "ID"
        },
        "severity": 600,
        "summary": {
            "type": "CONSTANT",
            "value": "Exmaple of an alarm trigger from an output"
        },
        "location": {
            "type": "CONSTANT",
            "value": "Corminboeuf"
        },
        "source": {
            "type": "CONSTANT",
            "value": "root.alarm-output"
        }
    },
    "else": {
        "serial": {
            "type": "FIELD",
            "field": "ID"
        },
        "severity": 100,
        "summary": {
            "type": "CONSTANT",
            "value": "Exmaple of an alarm trigger from an output"
        },
        "location": {
            "type": "CONSTANT",
            "value": "Corminboeuf"
        },
        "source": {
            "type": "CONSTANT",
            "value": "root.alarm-output"
        }
    }
}
root/alarm-trigger/callback.ospp
{
    "linkedOutputs": [
        {
            "outputId": "root.alarm-output"
        }
    ]
}
3. Create a dashboard to change the value and visualize the alarms
root/dashboard.view
{
    "configuration": [
        {
            "valueSubscriptions": {
                "values": [
                    {
                        "id": "root.alarm-trigger",
                        "right": "READ_WRITE",
                        "type": "BOOLEAN"
                    }
                ]
            },
            "basicWidgetSettings": {
                "showTooltip": true
            },
            "id": "-zdb_-mh",
            "type": "BasicInputOutputValue",
            "title": ""
        },
        {
            "alarmWidgetSettings": {
                "defaultFilter": "root.alarms.filters.all",
                "defaultView": "root.alarms.views.default"
            },
            "id": "ygpJ30cw",
            "type": "AlarmTable",
            "title": ""
        }
    ],
    "layout": {
        "lg": [
            {
                "w": 2,
                "h": 3,
                "x": 0,
                "y": 0,
                "i": "-zdb_-mh"
            },
            {
                "w": 10,
                "h": 3,
                "x": 2,
                "y": 0,
                "i": "ygpJ30cw"
            }
        ]
    },
    "breakpoints": {
        "lg": 1200,
        "md": 996,
        "sm": 768,
        "xs": 480,
        "xxs": 0
    },
    "cols": {
        "lg": 12,
        "md": 10,
        "sm": 6,
        "xs": 4,
        "xxs": 2
    },
    "rowHeight": 150
}
root/dashboard.web
{
    "moduleId": "modules.web.web-1",
    "title": "Home",
    "description": "OnSphere home",
    "tags": []
}
4. Change the value and observe the new alarm appears
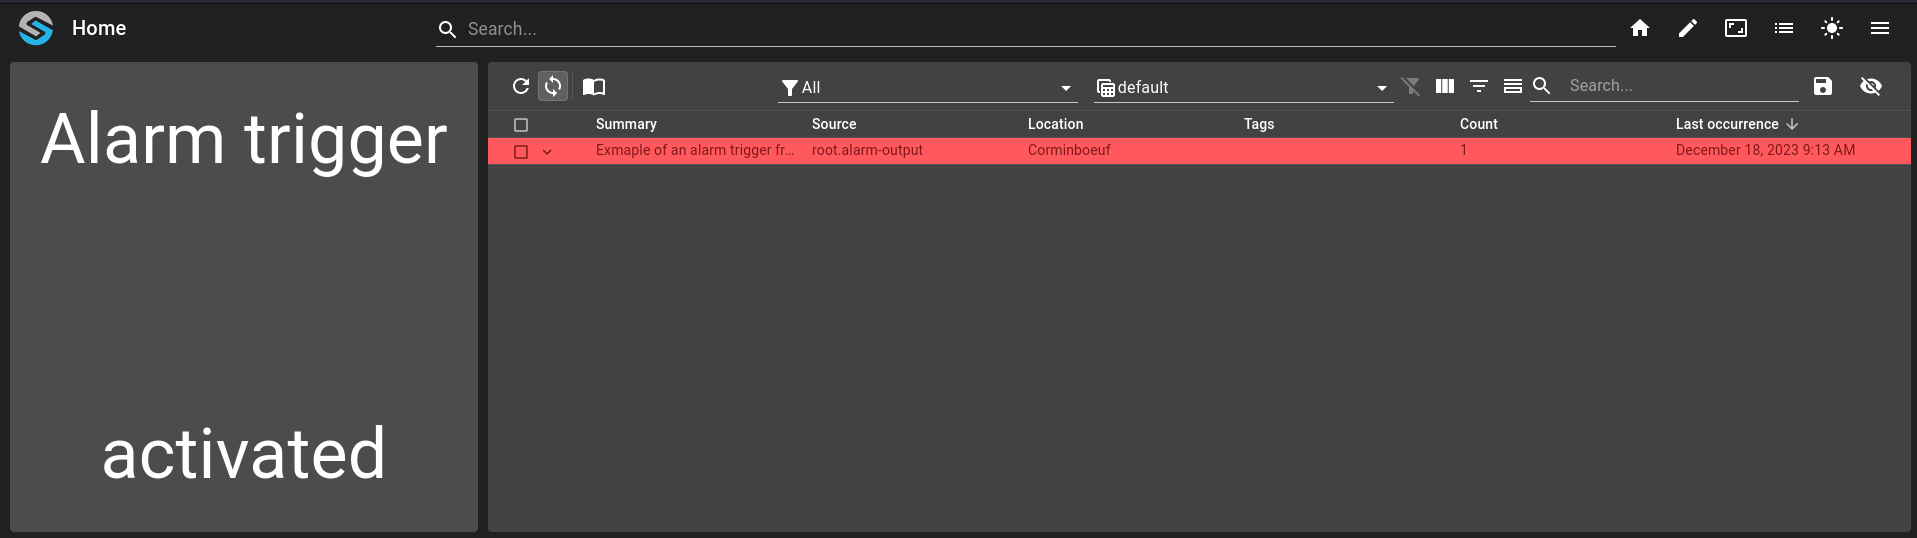
A critical alarm is created when the value is true. |
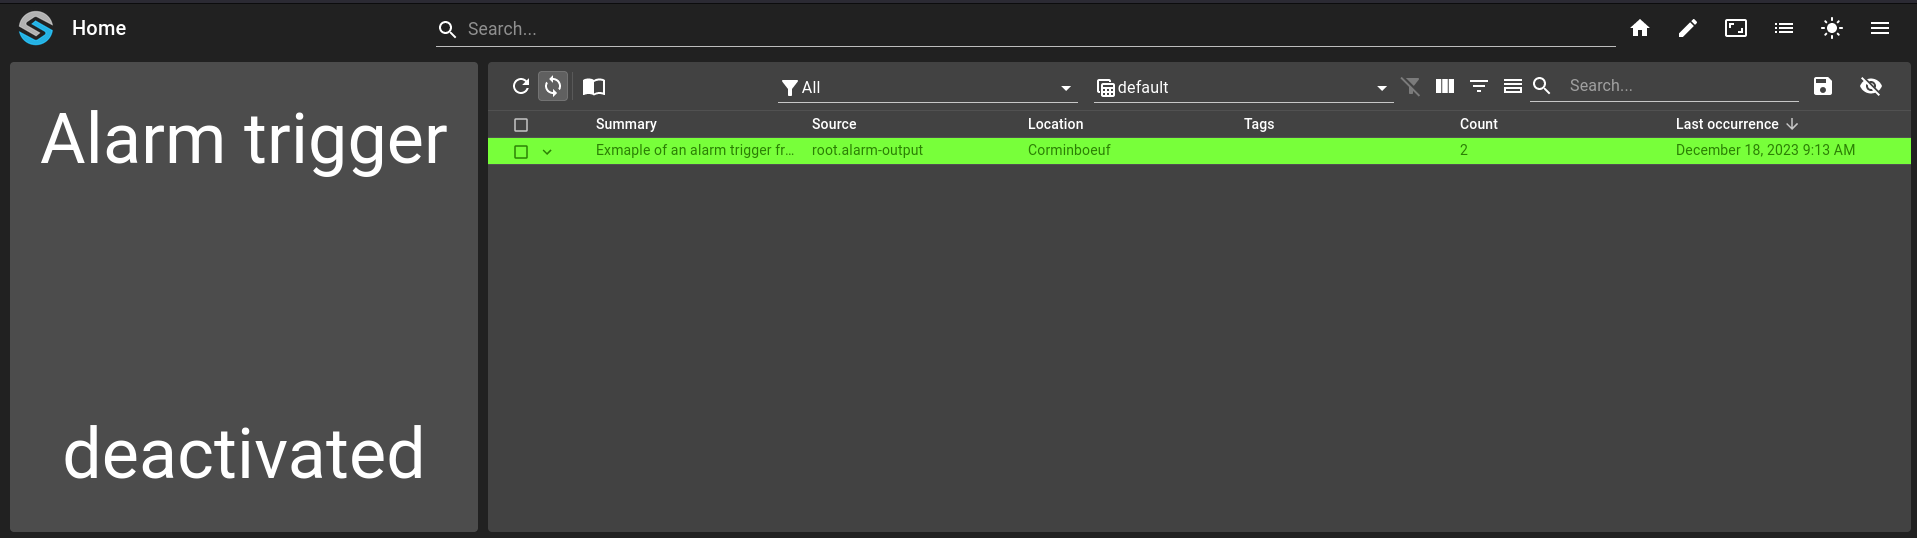
A clear alarm is created when the value is false. |