Outlook OAuth2 provider
This example explains how to configure Outlook as a notification provider using OAuth2 authentication via an Azure application registration.
Register a new application in the Azure portal and save the client ID and tenant ID.
Grant the required API permissions (
Mail.ReadWrite,Mail.Send,SMTP.Send) and have them validated by an admin.Create app roles for each permission in the Azure application.
Configure the OnSphere OAuth2 provider with the tenant, client ID and credentials.
git checkout origin/osp-communications-configuration .
git checkout origin/example-communications-configure-outlook-provider-using-oauth .
Glossary
Tenant : The tenant is the Directory (tenant) ID. You have to pass it to declare the Authority. ClientID : The clientId is the Application (client) ID. You have to pass it so that it is possible to check the client rights (application).
Known error of configuration
Warning
If you get an 535-5-7-139 error you can check this tutorial (https://ourcloudnetwork.com/how-to-fix-error-535-5-7-139-authentication-unsuccessful/). The most common reason you are receiving this error is that the application or device trying to send the email is using SMTP basic authentication. As of 1st October 2022, Microsoft automatically disabled SMTP based authentication in Exchange Online.
Note
An example for a notification configuration is available <a href=”../010_configure-aspsms-notification”>here</a>.
Configure Azure/Outlook to let the module send email through its services
Configure the provider
Configuration structure
![@startuml
skinparam backgroundColor transparent
package "modules" as modules {
node ospcoms as "osp-communications"
}
package "root" as root {
package "providerOAuth2" as provider {
[providers.coms] as provComs
[value.ospp] as valueSMS
}
[dashboard.view] as dash
}
ospcoms -[#black]-> provComs : **Own**
valueSMS -[#black]-> dash : **Give provider status**
@enduml](../_images/plantuml-13a3d6d9dc2b0ba71e2ea5e1948f40e385085134.png)
Steps
Note
Note that Microsoft may change the way things work. This tutorial has been tested the 11 May 2023.
1. Go to your Azure account and configure a new application
Go to your Azure portal and login.
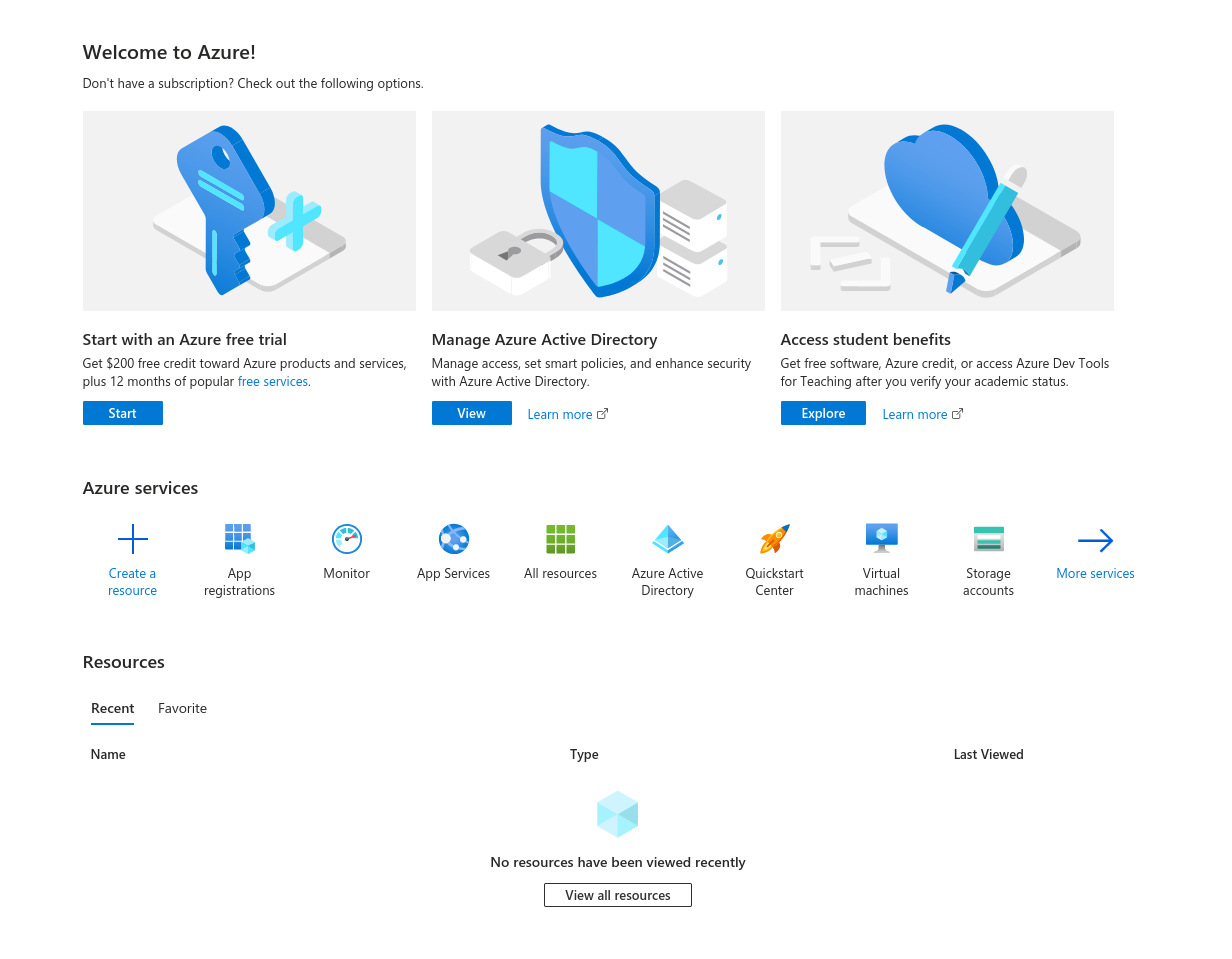
Go to App registrations.
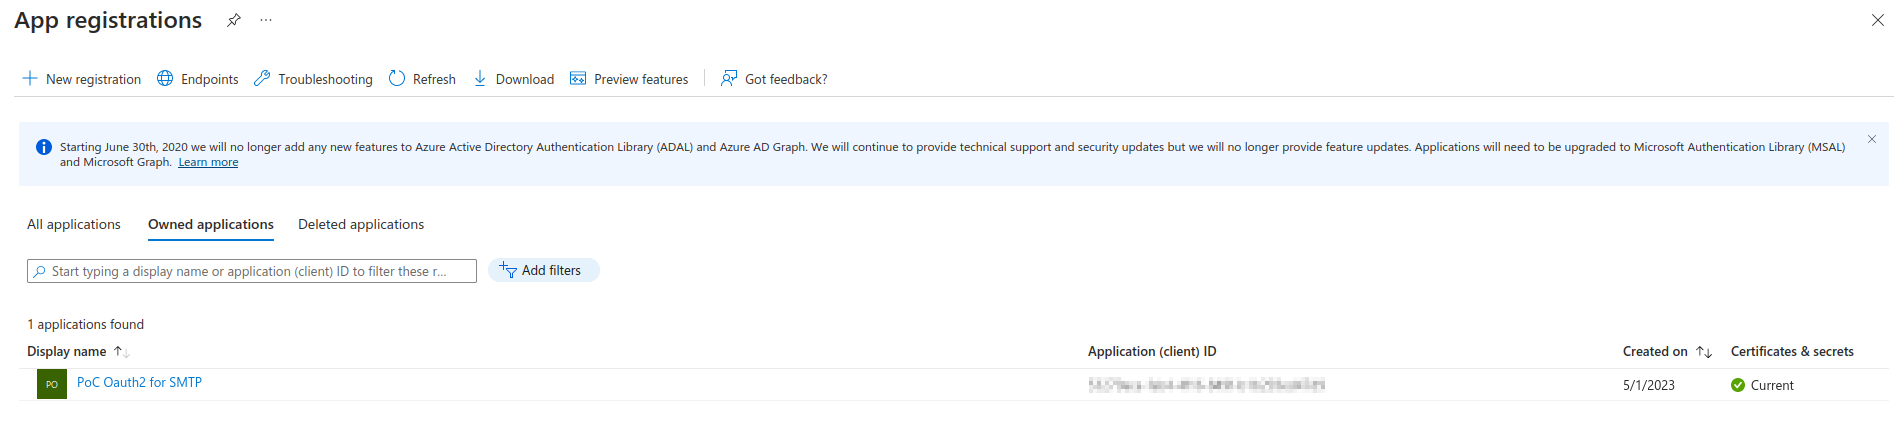
Click on New Registration
Give the application the name you want (for example OnSphereCommunications) and check Accounts in any organizational directory (Any Azure AD directory - Multitenant) and personal Microsoft accounts (e.g. Skype, Xbox). Confirm using the Register button.
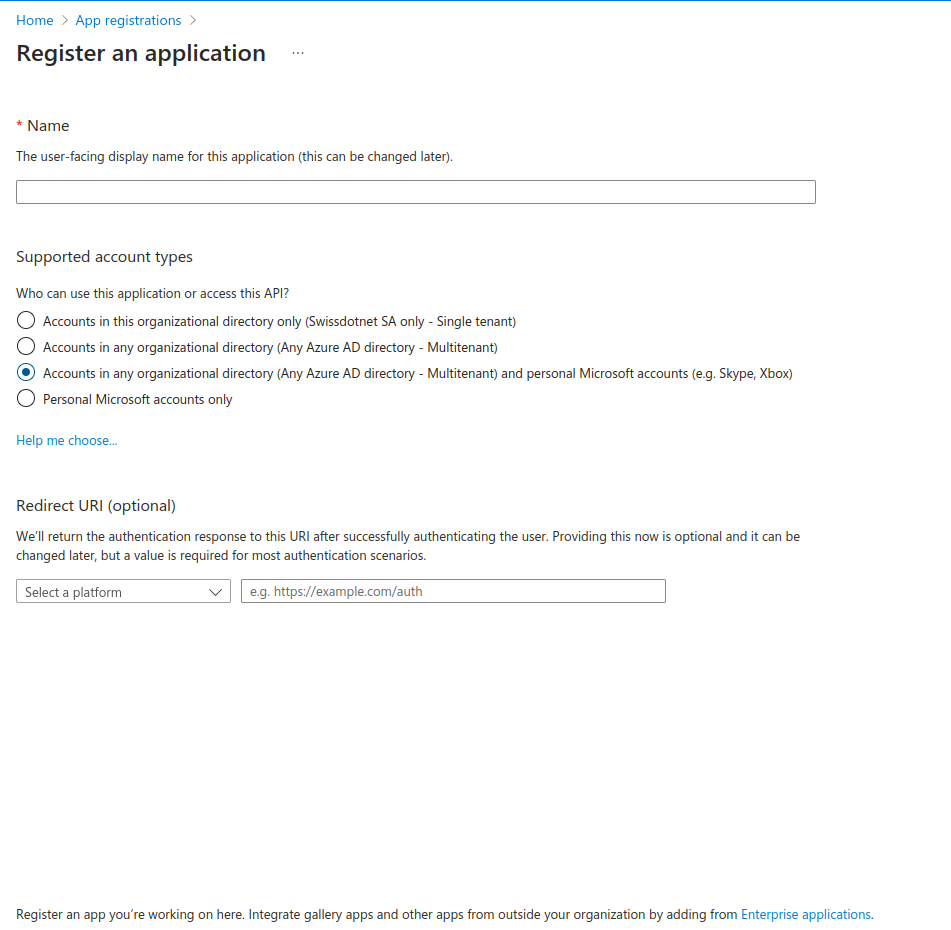
Save the application Application (client) ID.
Go the the API permissions tab of your application
Click on + Add a permission
Click on Microsoft Graph
Click on Delegated permissions
Here you will have to add the following settings by checking the box (you can copy paste the text bellow inside the Select permissions text input bar) :
Mail.ReadWrite
Mail.Send
SMTP.Send
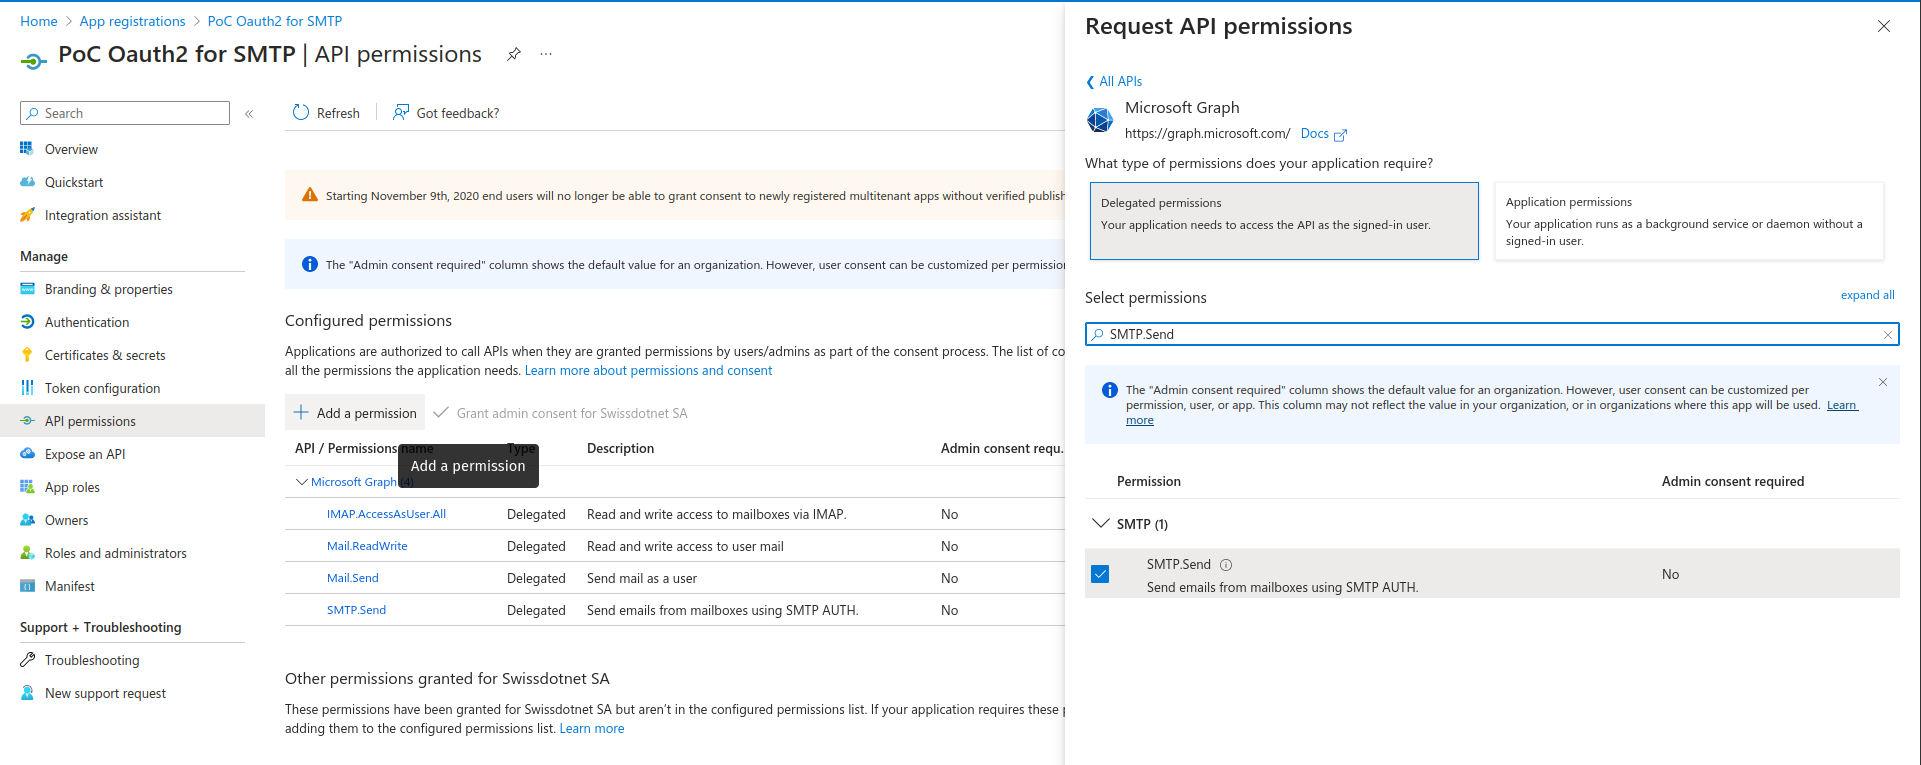
Verify that it is validated by an admin (under the Status column there should be a green check mark)
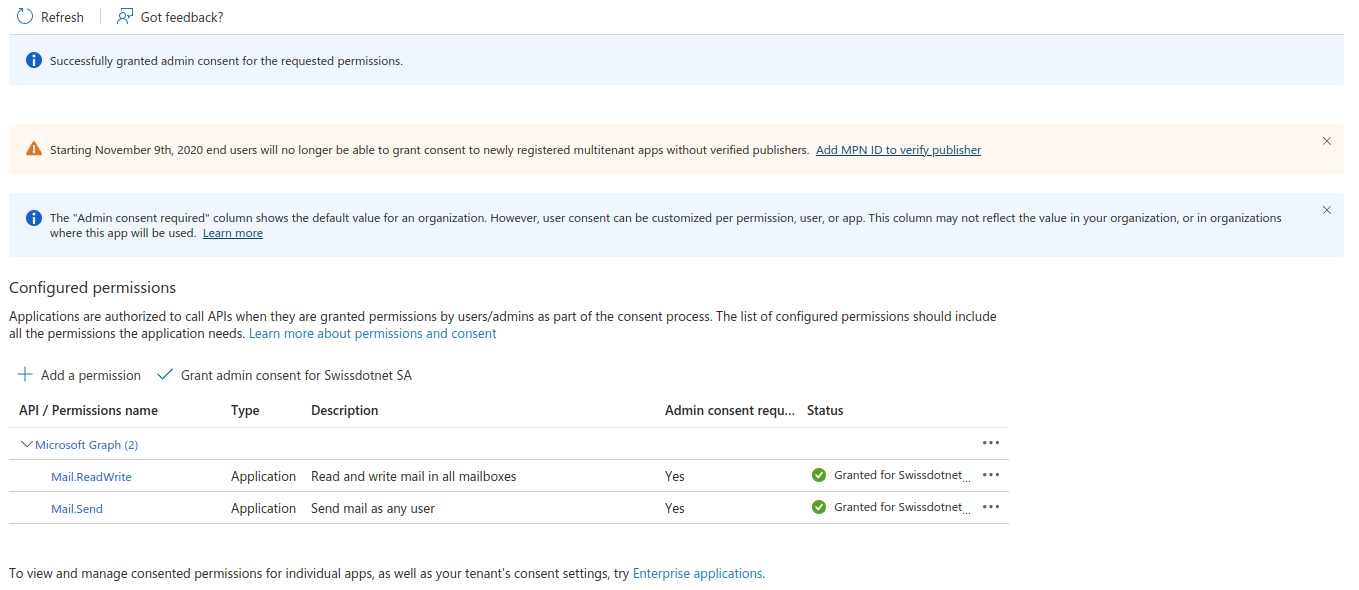
Once this is done you can click on App roles (side menu).
Click on + Create app role. You will have to do this 3 times.
Create an app role for SMTP.Send
Create an app role for Mail.Send
Create an app role for Mail.ReadWrite
Don’t forget to fill the fields :
Display Name. Fill with a name that makes sense for you
Check Both in allowed member types
Value. this should be (SMTP.Send, Mail.Send and Mail.ReadWrite)
Description. Fill with a description that makes sense for you
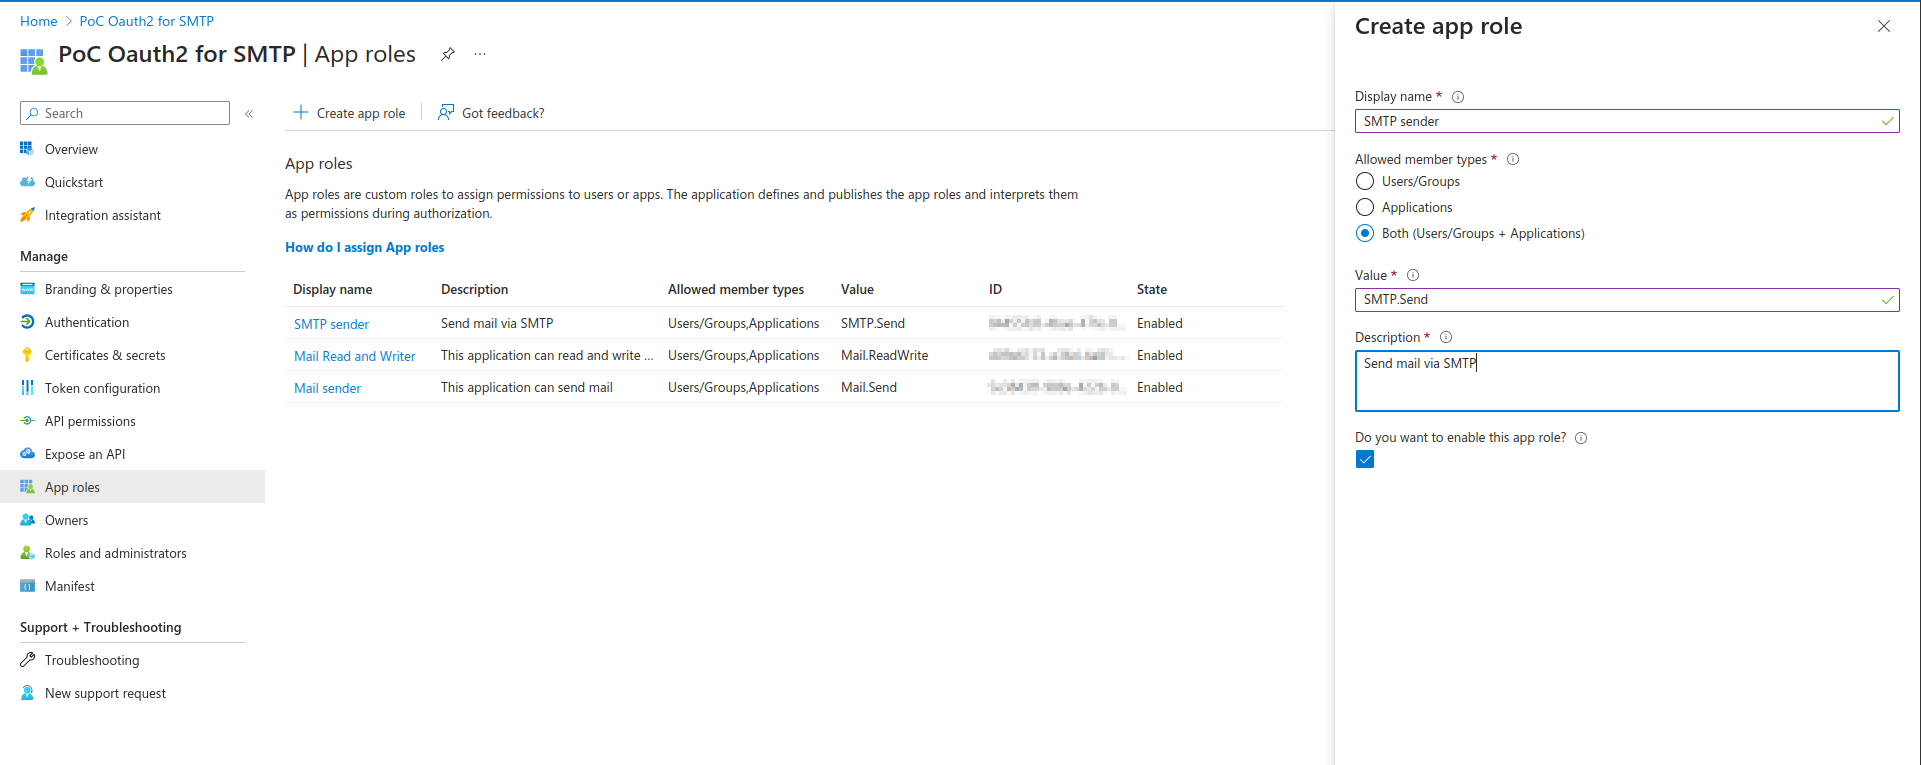
Once every thing is configured you can go to the next step.
Warning
If you encounter any configuration problem please contact your Azure AD administrator.
2. Configure the provider using OAuth2
root/providerGmail/provider.coms
{
    "moduleId": "modules.communications.communications-1",
    "providerType": "EMAIL",
    "authenticationConfiguration": {
        "type": "OUTLOOK_OAUTH2",
        "username": "${YOUR_EMAIL}",
        "authority": "https://login.microsoftonline.com/${YOUR_TENANT_ID}",
        "clientId": "${YOUR_CLIENT_ID}",
        "passwordProvider": {
            "password": "${YOUR_PASSWORD}",
            "type": "PLAINTEXT"
        },
        "scope": [
            "https://outlook.office365.com/.default"
        ]
    },
    "sendingProtocol": {
        "type": "SMTP",
        "smtpHostServer": "smtp.office365.com",
        "port": 587
    }
}
root/providerGmail/value.ospp
{
    "name": "OAuth2 Provider Value",
    "description": "",
    "type": "BOOLEAN"
}